Warm Winter Makeup Tutorial Featuring Urban Decay's Naked Heat Palette
In the winter I tend to wear more makeup. I think it’s because in the cooler months my makeup stays on better and my skin is actually in a better mood than it is in the summer. Therefore, I have definitely been favouring a fuller face of makeup lately. For my complexion, I have always adored browns and oranges - I think they balance my skin tone out well whilst still making my eyes pop. So, with my new Naked Heat palette in hand I decided to make a warm and shimmery look to rock all throughout the winter months. If you want to know how I completed my look exactly, keep on reading.
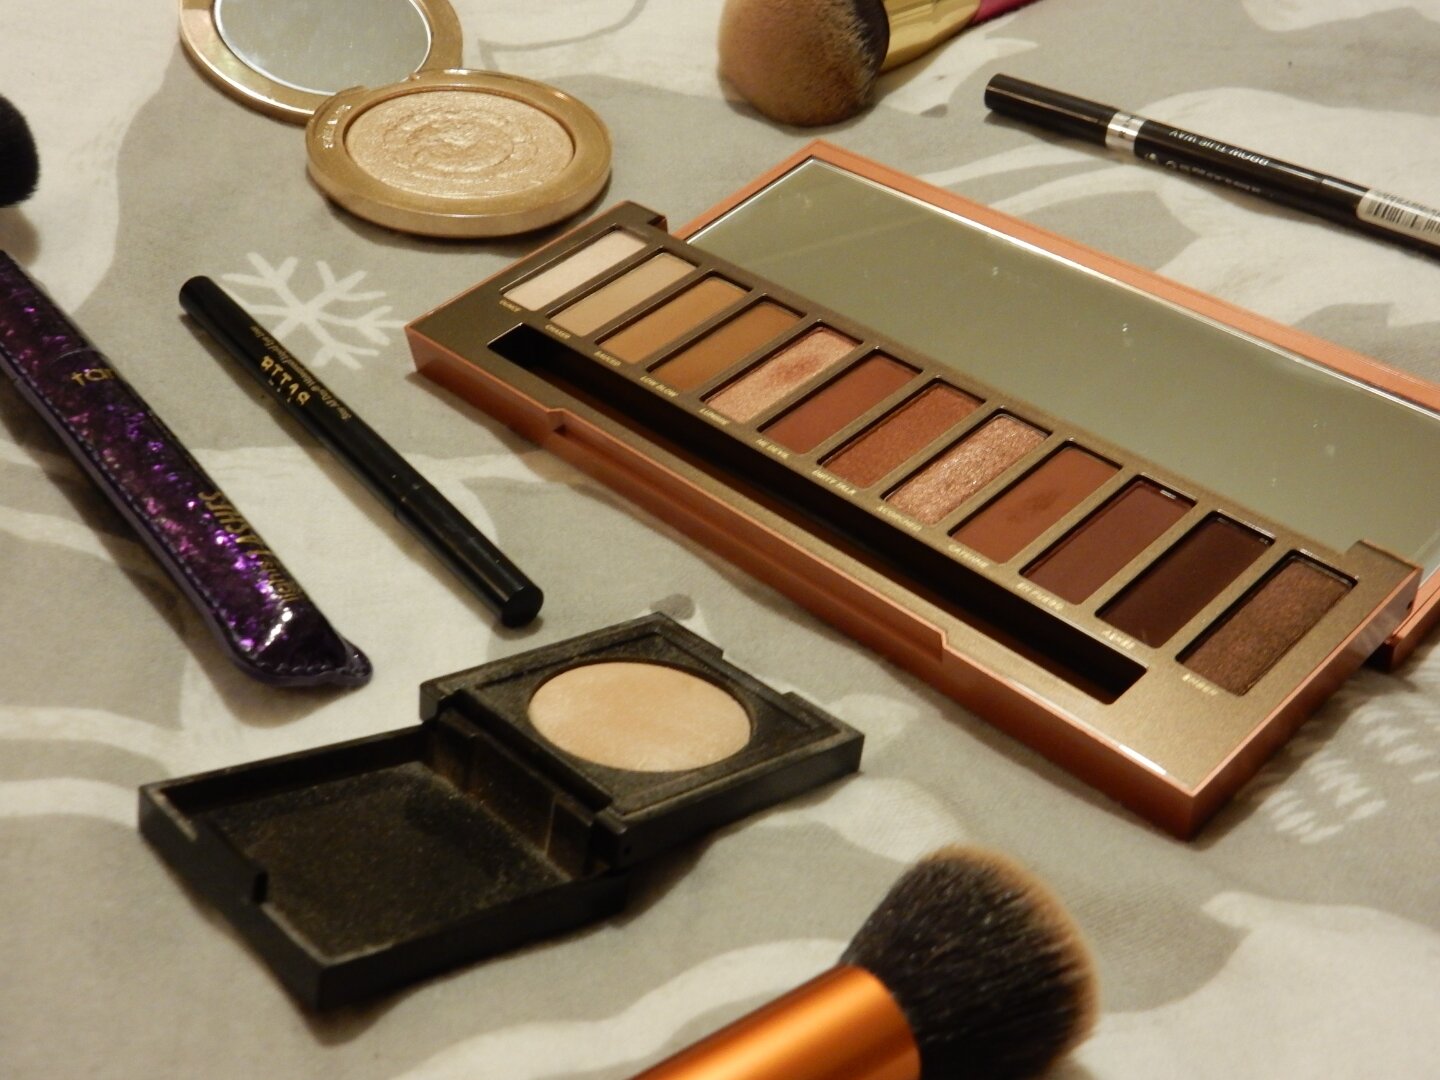
Before I get too deep into the tutorial, I just wanted to say that this, like pretty much all of my makeup looks on my blog, was very spontaneous. I never really plan out my makeup looks, I just pick a piece of makeup I really want to use and then build my look around that. For this look, the key piece was my Naked Heat palette, which I’m a bit late to the party with but am absolutely obsessed with! I just adore all of the burnt shades and I really cannot wait to create even more looks with it.

Before I even start applying any makeup, I always make sure my skin is cleansed and moisturized. I have found over the years that this is not only good for your skin but it also helps your makeup stay on and take to your skin better. Then I start on my base. Firstly I apply a concealer around my eyes, on my chin, the bridge of my nose and any other problem areas I may have that day. For this I used my favourite concealer that is now unfortunately discontinued - the SEVENTEEN stay time concealer in extra fair. I then blend a foundation all over my face with the world renowned Beauty Blender. My most used high coverage foundation at the moment is the Joan Collin’s first base foundation in cool fair.
Once my base is complete, I move on to eyebrows. With a very light hand I make upwards strokes with Rimmel London’s brow this way eyebrow pencil to create the illusion of fuller brows. I then lock them in with the Pixi brow tamer.
Now it’s on to the main attraction - the eyes. As I said before I mainly used the Urban Decay heat eyeshadow palette to create this look. First I take one of the lightest matte shades “sauced” and brush that all over my eyelid right up to my brows, this creates a nice base to layer your other eyeshadows on and build up the colour. Then I took a slightly darker matte shade called “low blow” and swept this into my eyelid crease whilst taking it down into my lower lash line too. This gives my makeup more depth and dimension. The final shade I took from the heat palette was a shimmery orange shade called “lumbre”. I patted this on the the edges of my eyelids and blended it in with the brown, to add a little glitter to my look. To define my eyes even more I decided to add some winged liner with my all time favourite Stila stay all day liner. Then to complete the eyes I just brushed my upper and lower lashes with some of Touch in Sol’s stretchex mascara.


So, now that we’ve given our eyes some dimension it’s time to move onto defining our face a little more. I carve out my cheekbones, temples, nose and chin with Estee Lauder bronze goddess illuminating powder. For pale people, like me, this is a great contour because it’s not too dark and can look nice and glowy at the same time too. To add even more glow I brush Laura Mercier’s matte radiance baked powder along the tops of my cheekbones, the bridge of my nose and my cupids bow. To finish off the look I decided to use a berry lipstsick by Ted Baker.
To be honest, I’m pretty happy with how this look came out, except for the lips. In hindsight I think I should have used a more orange or brown shade to complement the eyes a bit more. Whilst berry lips do scream winter, I think they looked a bit less dramatic alongside the smokey warm eyes. So what did you think? Is this a look? Let me know in the comments below.